![]()
STILL - Reference Manual
Contents
Tutorials
- Getting started with STILL
- Adding a text and vector watermark to a batch of photos
- Automatically resize and crop a batch of images
- Batch convert camera RAW files to another image format
- Designing a photo album with STILL
More help
Getting started with STILL
This tutorial provides a quick walk-through of the core features of STILL. You will learn how to import images, add effects to an image or to a batch of images as well as how to create collages and export images.
STILL editor overview
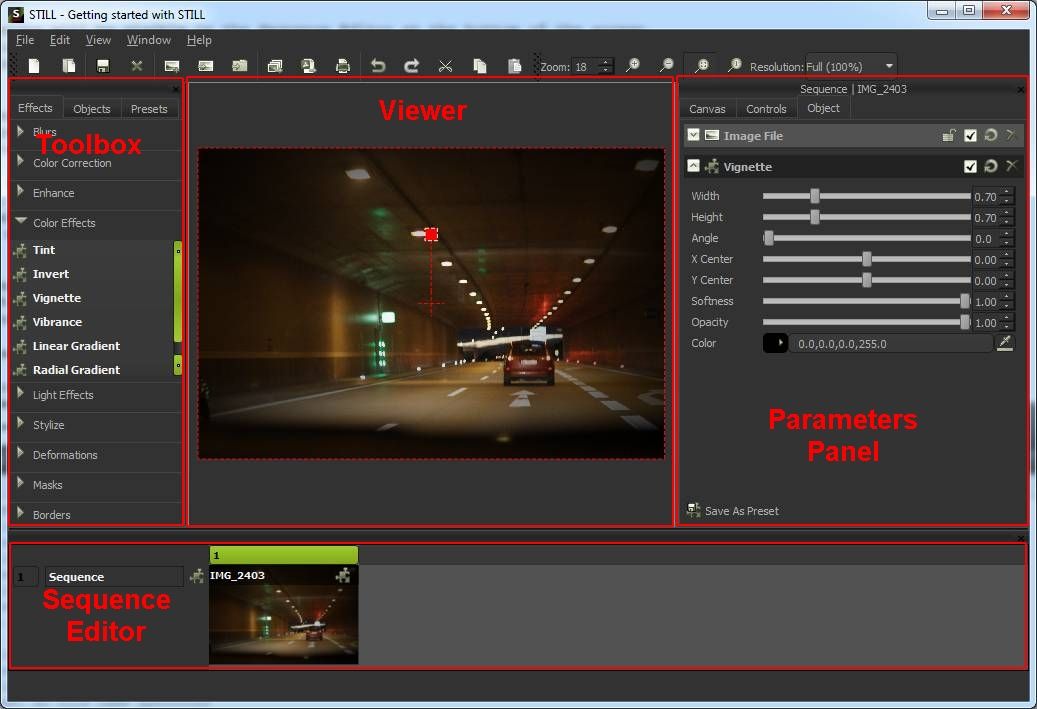
The STILL user interface is composed of five main sections:
The Menu and toolbar which allows you to create, open and save a STILL project, import or create new images and export or print the edited images.
The Sequence editor is where you import, browse and select the image that you want to work on.
The Toobox panel contains the STILL's effects, objects and the presets library.
The Viewer is where the currently selected image is rendered and where you can insert, visualize and edit objects.
The Parameters panel is where you adjust the properties of the canvas, the effect parameters or the properties of an object.
Getting images into STILL
Select File > Import Image or click the Import Image tool button and browse to the location where
your media files are located. Select one or more images and click on the Open button.
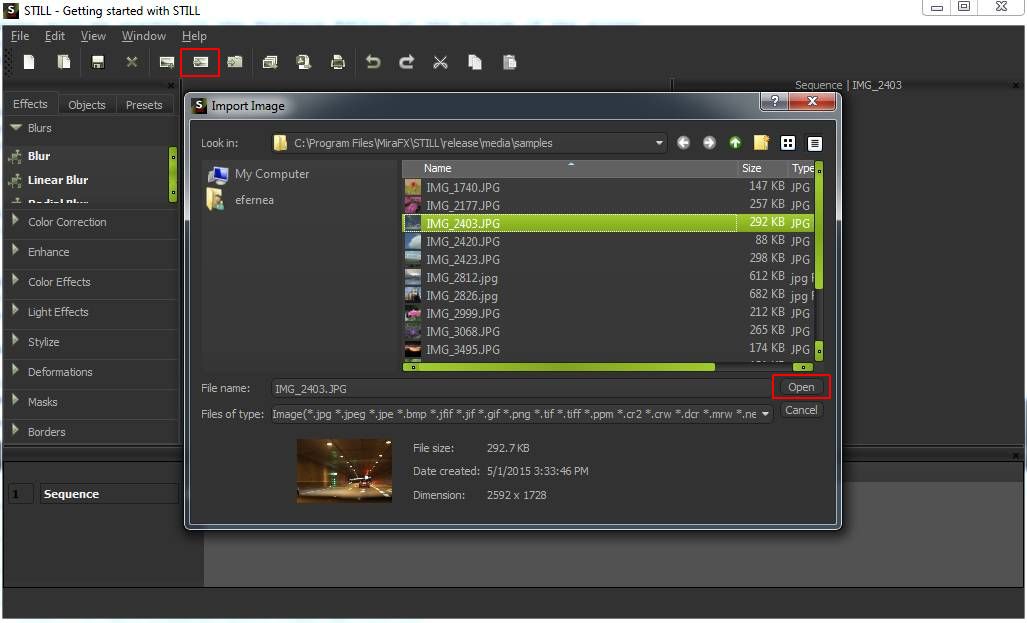
The imported image will be visible in the image Sequence at the bottom of the screen. You can now select the image you want to work on by clicking on the thumbnail in the Thumbnails browser.
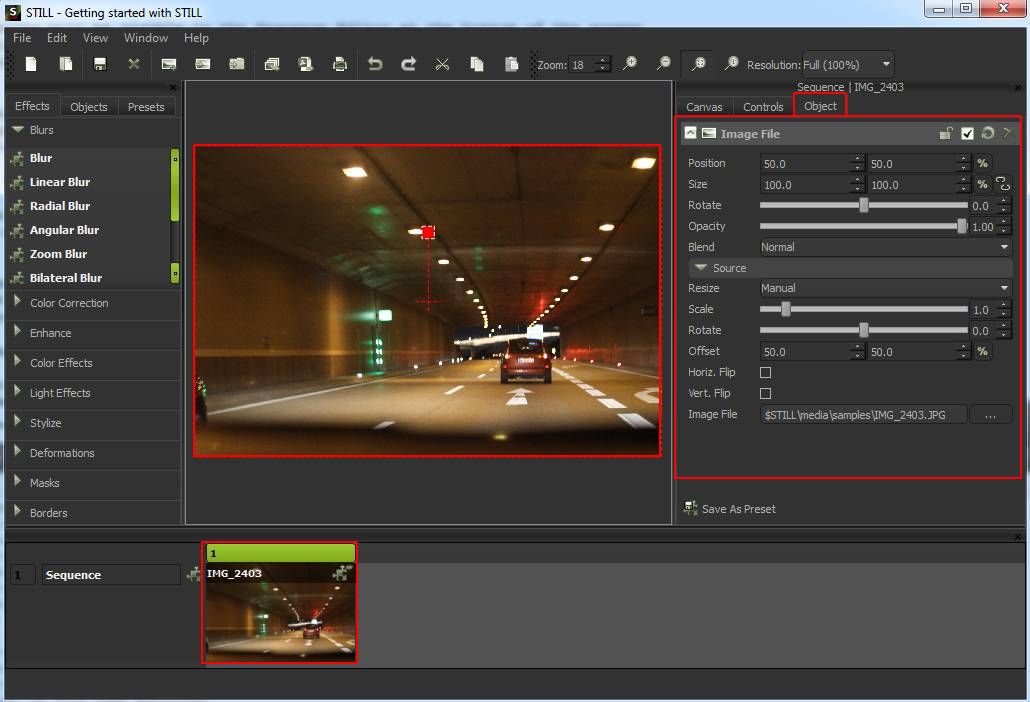
Upon selection the image will appear in Viewer (the central section
of the window). The Viewer lets you zoom in and out using the Ctrl> key and the Mouse Scroll Wheel
or pan to a different part of the image (press the Ctrl key and hold the Right Mouse Button while dragging).
You can also move, resize, rotate, scale or change the opacity of the image either interactively inside the Viewer (refer to "Keys and Mouse Reference" from the "STILL Reference Manual" for the available actions) or by changing parameter values of the Image File item under the Controls tab.
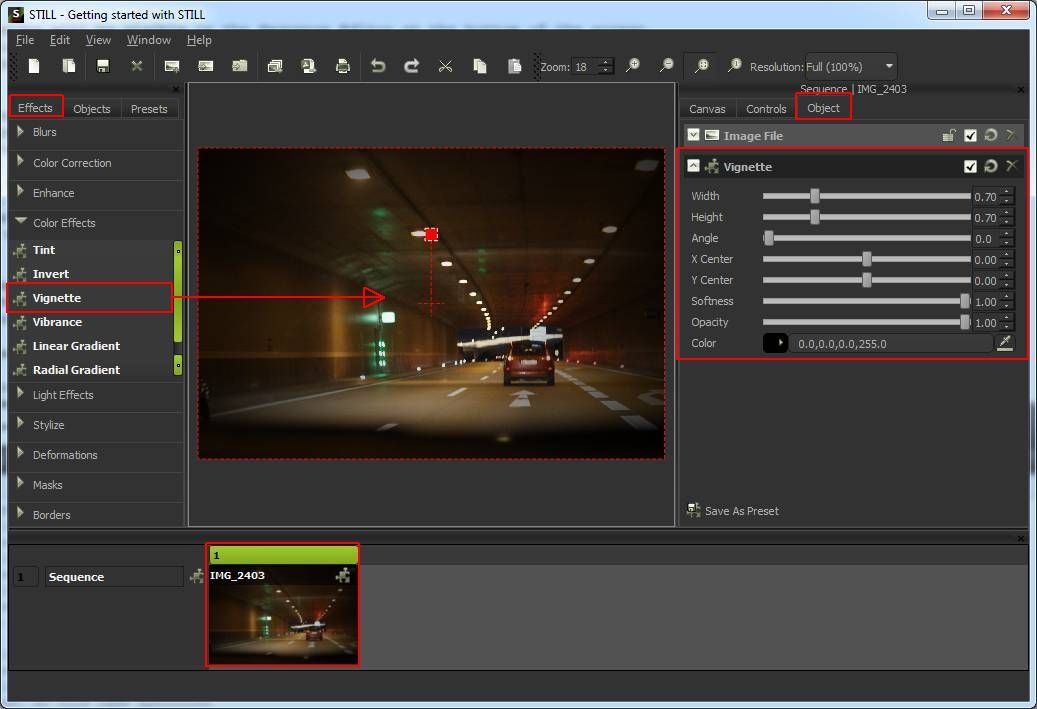
Adding effects to an image
Drag a filter from the Effects Toolbox at the left and drop it onto the image object in the Viewer. Adjust the effect parameters using the sliders and color dials provided by the filter editor located under the Controls tab at the right-hand of the screen. The Controls panel contains parameter editors for all the effects and objects in the currently selected image.
Effects are applied on the selected image one after the other, from top to bottom. An effect can be moved before or after another effect by drag and drop.
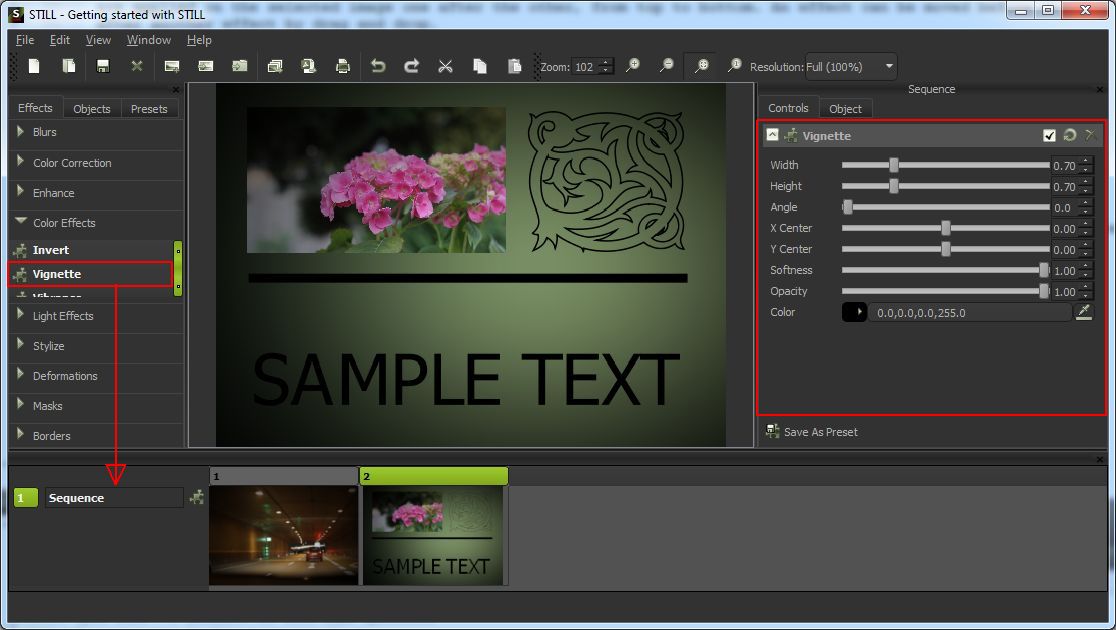
Adding effects to multiple images
Effects can also be applied to all the images in the project's Sequence at once.
Right click the Batch header (found to the left of the Thumbnails browser) and choose the desired effect from the context menu or drag the effect from the Effects toolbox onto the Sequence header.
Adjust the parameters in the Controls tab from the Parameters panel. Sequence effects are applied to all the images in the Sequence. Changing their parameters values will affect all these images.
Creating collages
STILL offers the possibility to compose new images from other image files, vector files, shapes and text. It is also possible to apply effects to individual items of the collage or to the collage itself.
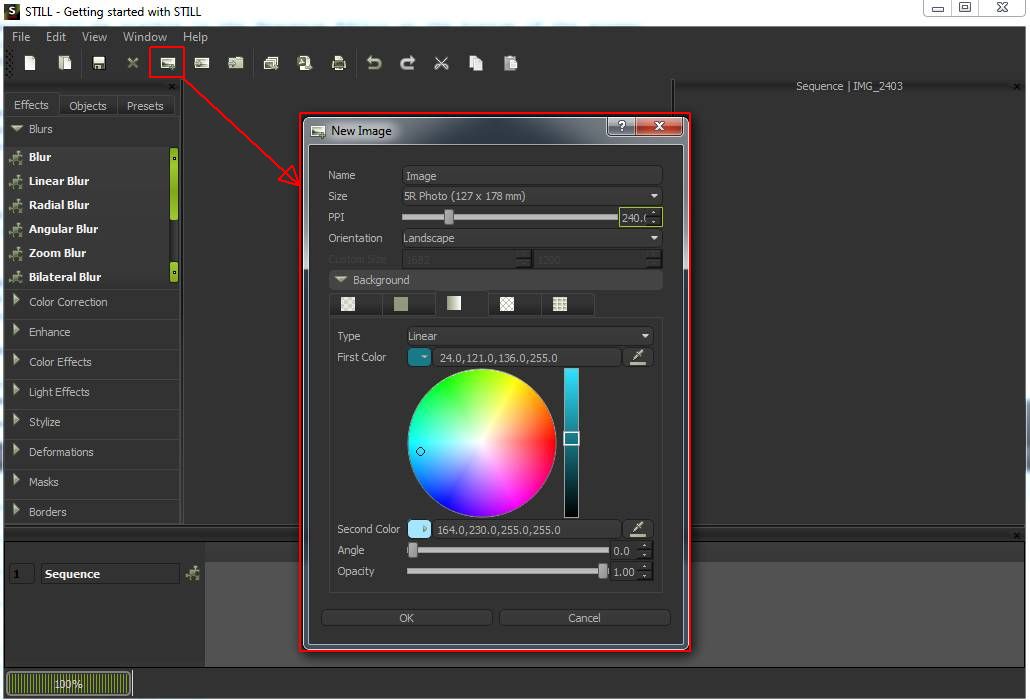
Creating the canvas
Start by creating a canvas which will be used as background for the collage.
Select File > New Image or click the New Image tool button. A dialog box
will open allowing you to to choose a predefined size or a custom size, the opacity
of the image and the background fill color, gradient, pattern or texture.
Once created, the canvas dimensions and background can be changed at any time from the Canvas tab in the Parameters panel.
Inserting objects
To add an image, grab the Image File, Shape, Text or any other tool from the Objects
toolbox and drag it onto the Viewer area. Select the Image File inside the Object tab in the
parameters panel. The inserted image will appear in Viewer. A file explorer window will open.
Locate and select the image you want to insert and click Open.
The newly inserted object will appear inside the Viewer where you can visually move, resize, scale and rotate the object. You can also adjust the object's parameters in the Controls tab or the Object tab.

Exporting images and collages
Edited images can be exported as individual files or as pages of a PDF document.

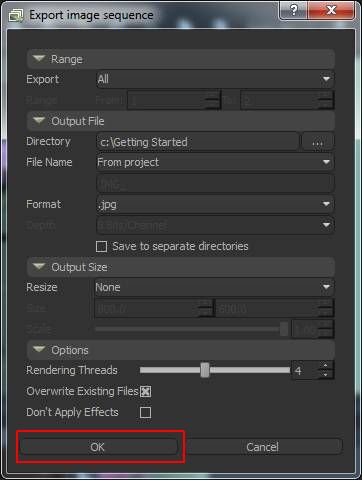
Exporting the image sequence
Select File > Export image sequence or click the Export image sequence tool button. The export dialog
box will open allowing you to select the directory where you want your images to be saved and several
export options.
Select the image range you want to export and an image format. Optionally you can resize the output images to new dimensions by setting the resizing method, the dimensions or the scale.
Click OK and wait for the progress bar to complete.
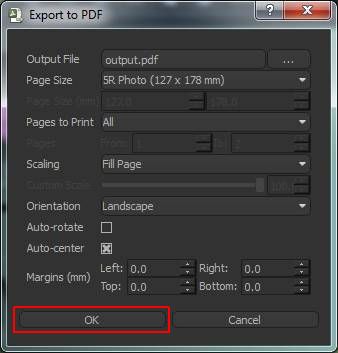
Exporting to PDF
Select File > Export to PDF or click the [Export to PDF] tool button. Specify the name of the output PDF file
and click OK.
Among other options, the PDF export dialog allows you to select the image range you want to export as pages of the PDF document, set margins and auto-rotate images to fit page orientation.