![]()
STILL - Reference Manual
Contents
Tutorials
- Getting started with STILL
- Adding a text and vector watermark to a batch of photos
- Automatically resize and crop a batch of images
- Batch convert camera RAW files to another image format
- Designing a photo album with STILL
More help
Designing a photo album with STILL
This tutorial demonstrates how to create a photo-book with STILL Image Editor. You will learn how to create pages, insert and adjust photos, add text, vector decorations and borders as well as how to export the photo album to PDF.
Creating a new album page
Select "File>New image" from the menu or click the New image tool
button. The page creation dialog will open. This lets you select the size of the page
from a list of standard page and photo formats or to specify custom dimensions.

First you have to select a paper size. 8R Photo (203 x 254 mm) format which corresponds to 8 x 10 in. is a common photo album format. Set the resolution to 300 ppi if you want to create a printable album and set the page orientation to Portrait. Open the Background control and click Solid Color tab which will let you select the background color of the page. Note that page dimensions and background can be changed at any time from the Canvas tab inside the Parameters panel.
Click the OK button to confirm. The created page will be visible in the Thumbnails browser at the
bottom of the screen.
Repeat this step for each new page you want to add to the photo-book or duplicate and existing page by right clicking on a page thumbnail and selecting "Duplicate".
Once a page is created you can start editing it it. Select the page by clicking on thumbnail image in the Thumbnails browser.
Inserting a photo into the page
Open the Objects tab from toolbox and drag and drop the Image tool into the Viewer. Select the Image File inside the Object tab in the parameters panel. The inserted image will appear in Viewer.
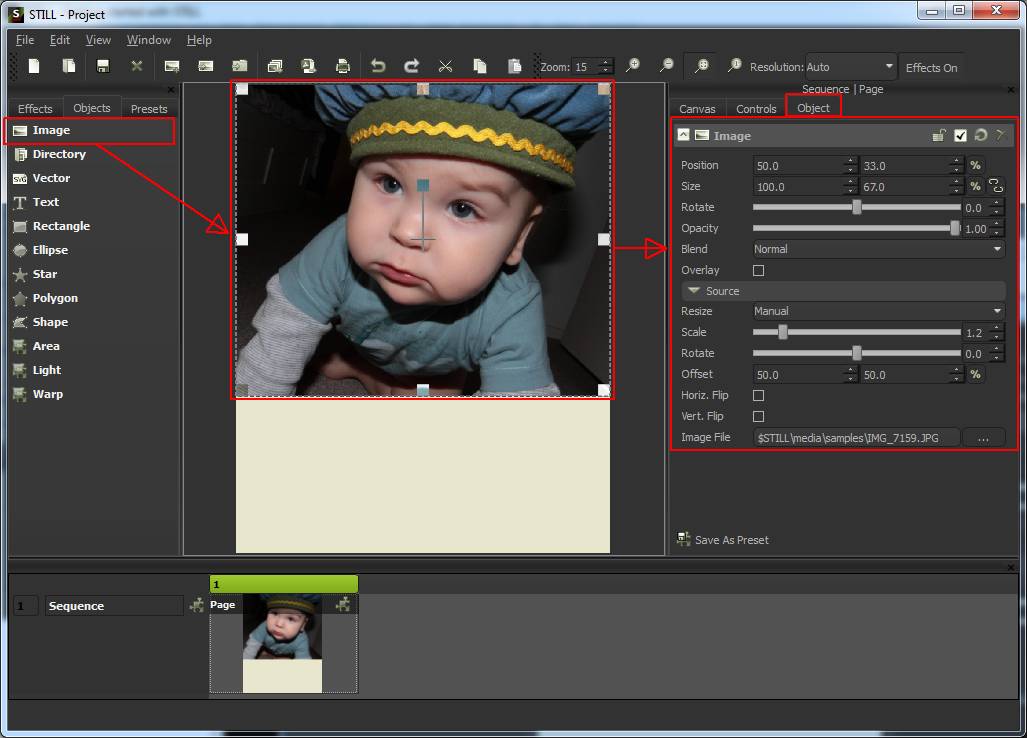
Select the image object in the Viewer by clicking on it (a selected object has a dash line around it). Adjust
the dimensions of the object by dragging its borders or corners. Hold the
You can further adjust the parameters of the inserted image by selecting the "Object" tab from the parameters
panel. Select "Resize method > Fill" to automatically resize, center and crop the image inside the
object's frame. If you want to position and crop the image manually select "Resize method > Manual"
and hold
Adding effects to the photo
Open the "Effects" tab from the toolbox select and drag the desired effect and drop it over the image object in the "Viewer". Once the effect is added to an object, you can view and change its properties in the "Object" tab.
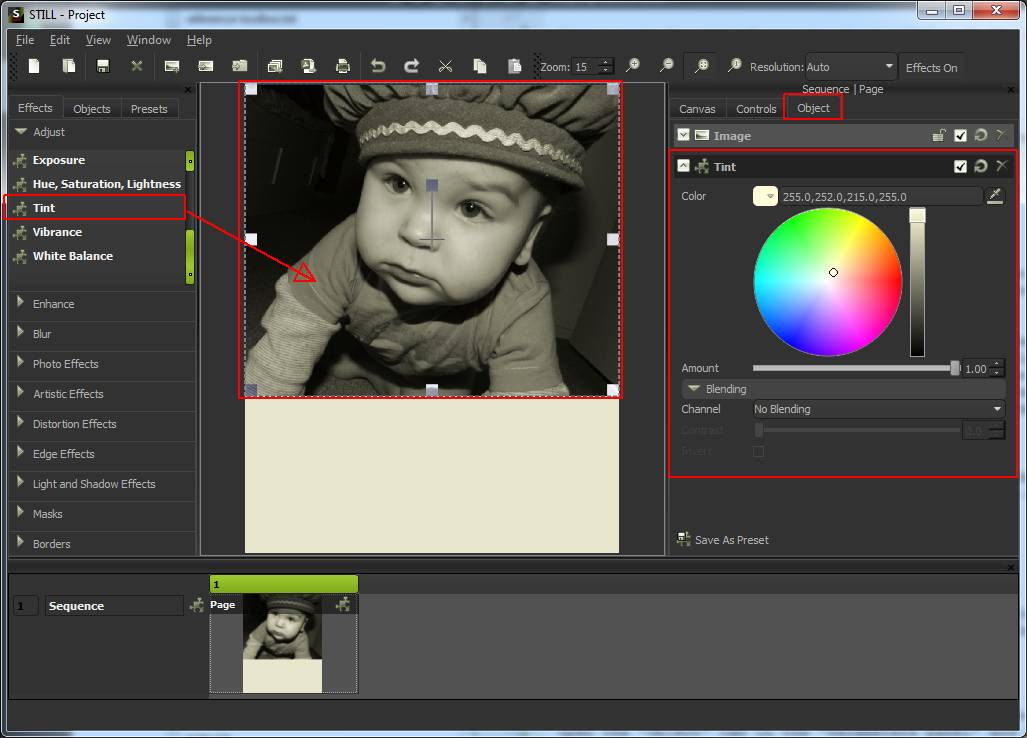
In this tutorial we will use the "Tint" tool to achieve a Sepia effect. Choose the tint color (i.e. 255.0,252.0,215.0) using the HSV color dial. Drag the "Amount" slider to maximum and choose "Channel > No Blending" to completely replace original colors with Sepia tones.
Inserting text and vector ornaments
Open the "Objects" tab from the toolbox and drag the "Text" into the "Viewer". To edit and format the text, open the "Object" tab in the "Parameters panel" and locate and expand the object editor named "Text". The text editor lets you enter text, choose a font and color, adjust the opacity and select a blending mode.
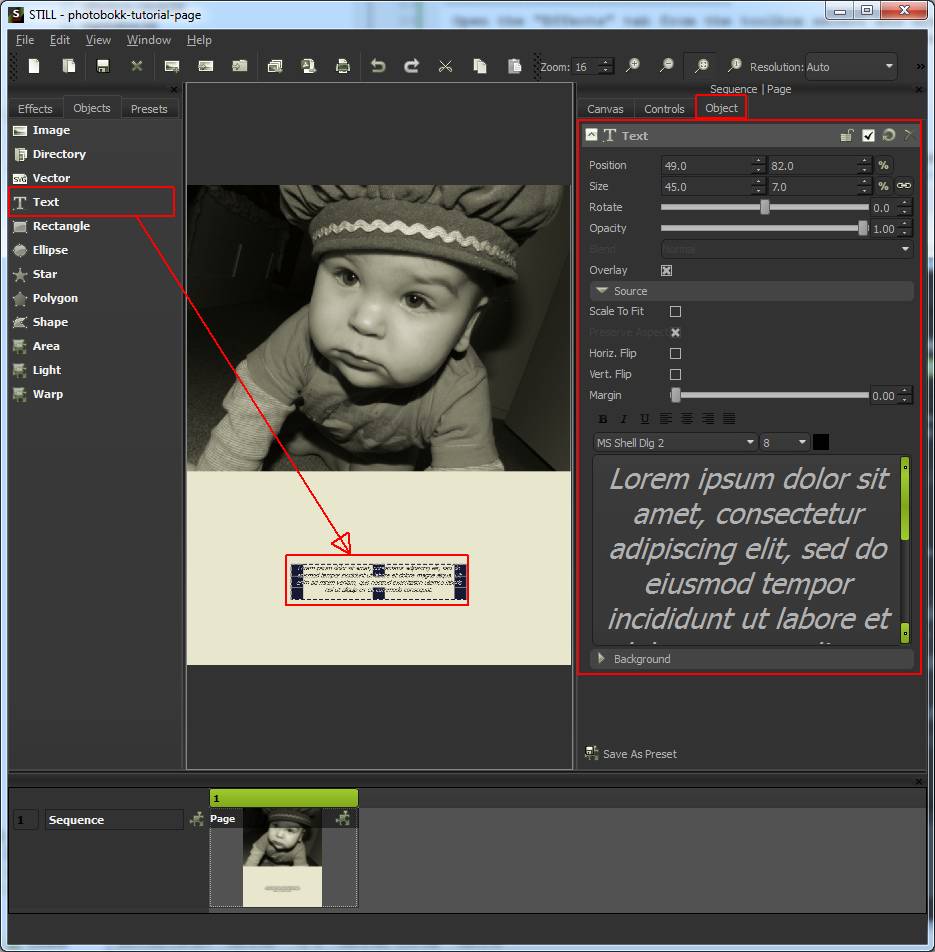
If you are creating a printable photo album it is important to select the Render as vector checkbox. Vector text is rendered as vector instead of being merged into the raster layer. This will preserve the text quality when the generated PDF document is scaled or printed to different resolutions.
To insert a vector ornament drag and drop the "Objects > Shape" tool from the toolbox onto the Viewer. Select an SVG file from
the Shapes/Flourishes directory and click Open.
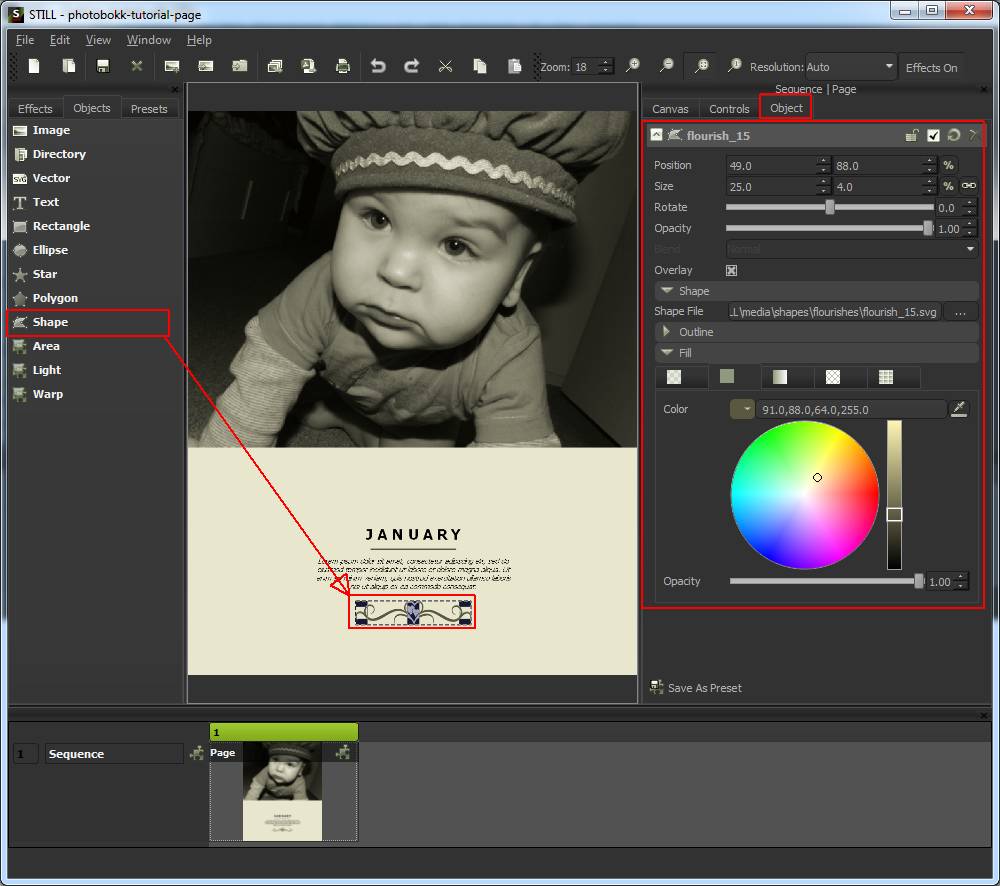
The inserted shape file will appear inside the "Viewer" where it can be visually positioned, resized, scaled and rotated. You can also adjust the opacity and blending mode as well as stroke and fill color of the shape from the "Controls" tab in the "Parameters panel". Do not forget to select the Render as vector checkbox to render the shape as vector.
Adding a border to the page
Open the "Effects > Borders" tab from the toolbox and drag and drop the "Rectangle Border" over the page thumbnail in the Thumbnails browser.

Go to the Controls tab and open the "Rectangle Border" editor to adjust its properties. Check Render as vector to have the border rendered as vector. Set the "Border size" to 4 and select a color for the border from Fill > Solid Color tab.
Repeat this step if you want to add more borders (of different colors and sizes) to the page.
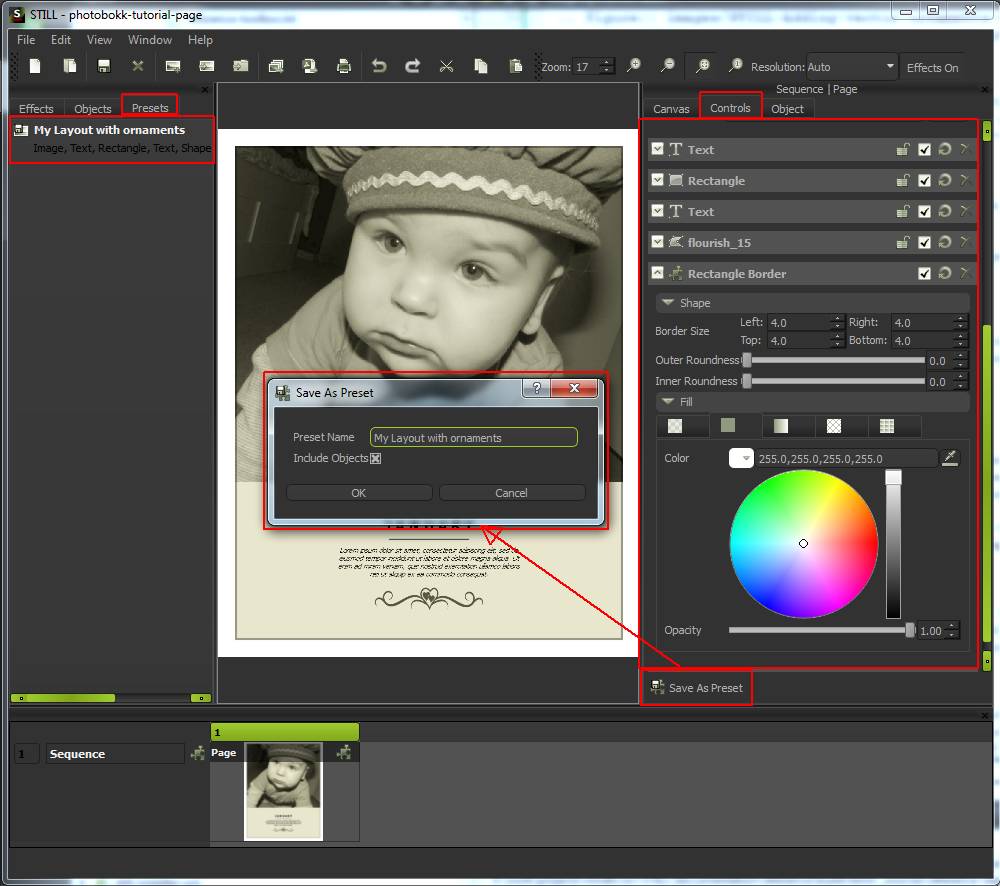
Saving a page as template
STILL allows you to save a page layout and its decorations and use it as template for other pages. Inside the Objects tab click the [Save Preset] button, choose a name for the template, select the "Include Objects" option and click [Ok]. The saved template will appear inside the "Presets" tab.
To use a template, create a new page, select the template from the "Presets" tab and drag it over the empty page. The objects and effects from the preset will be added to your page. All you need to do is to replace the template's image files with the new ones by editing the "Image" parameter from the "Controls" tab for each image object.
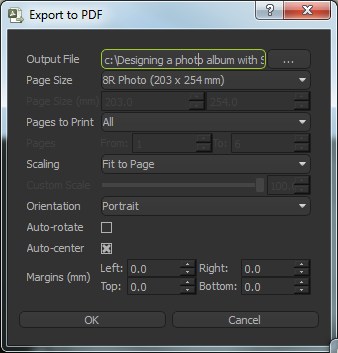
Exporting the album to PDF
Select File > Export to PDF or click the Export to PDF tool button. Specify the name of the output PDF file,
select 8R Photo (203 x 254 mm) for the page size and click OK. Note that the export page size and orientation
should match or at least have the aspect ratio of the created pages.