![]()
STILL - Reference Manual
Contents
Tutorials
- Getting started with STILL
- Adding a text and vector watermark to a batch of photos
- Automatically resize and crop a batch of images
- Batch convert camera RAW files to another image format
- Designing a photo album with STILL
More help
Automatically resize and crop a batch of images.
Here you will learn how to crop and resize multiple images to the same size of your choice using STILL. Once you have gone through this tutorial you will be able to-
resize multiple images into same dimensions in one go
create thumbnails of same dimensions for many images at once
import and edit an entire directory of images as if they were a single image, all in a matter of seconds.
Step 1: How to Import an Image Directory
There are two simple ways you can import image directory to STILL.
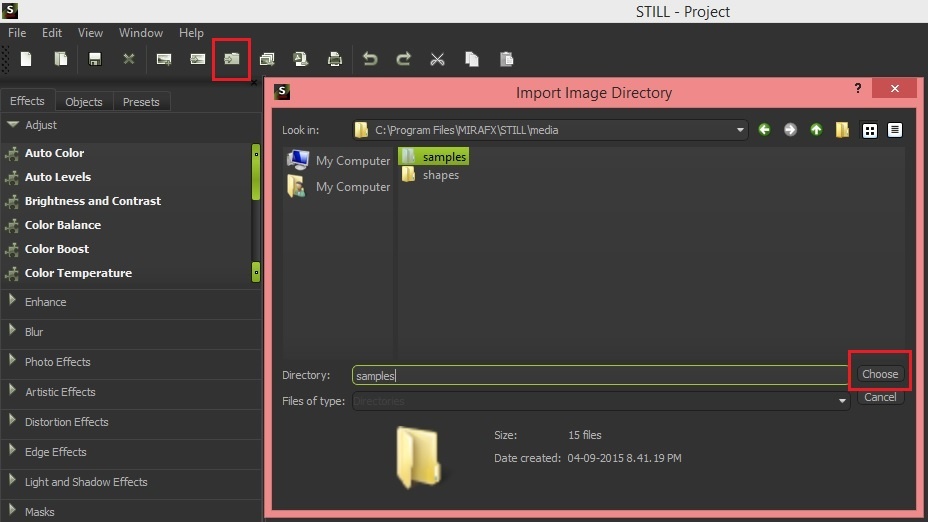
Method A: Select File > Import Image Directory. The import
dialog box opens. Browse to the location where you have stored your
image directories. Select one or more directories that you need, and
click on the Choose button.
Method B: Click on Import Image Directory icon. Clicking on this button will also open an import dialog box. Browse to the location of your image directories, select one or more of them, and click on the Choose button.
Step 2: How to Select the Images for Resizing
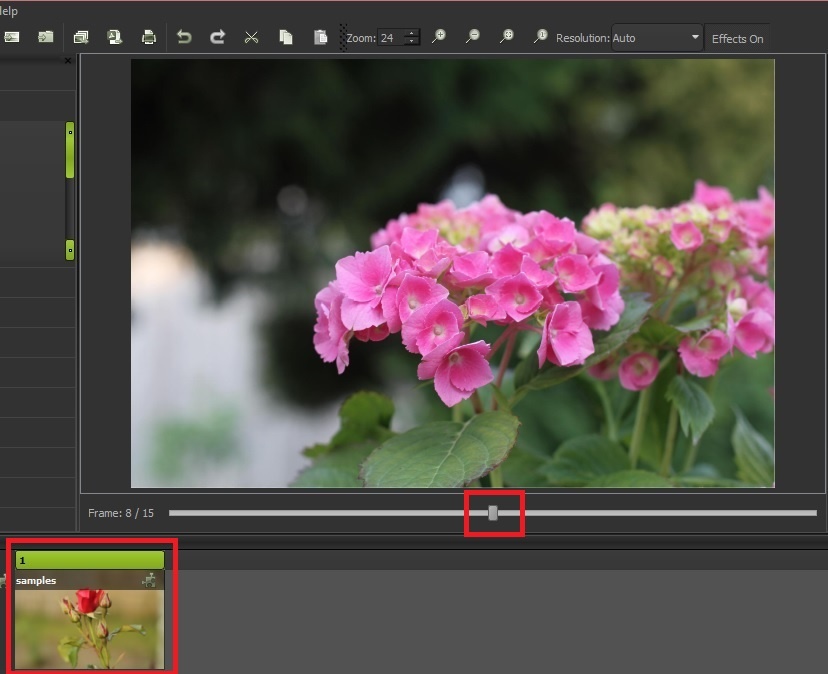
Once you have completed the previous step, the imported directories will automatically appear in the Thumbnails browser at the bottom of the screen. Follow the procedure described below to select images from those directories.
The directories are organized in the Thumbnails browser. You can select the directory you want by simply clicking on the respective thumbnail.
Once selected, the directory content will immediately appear in the Viewer (the central section of the screen). Now, you can view all the images in the directory by sliding the Frame slider horizontally, which sits at the bottom of the Viewer.
You can also check your images in detail in the Viewer by using the zoom in and zoom out functions. You can use the zoom feature either by holding the
CTRLkey and then scrolling theMouse Wheel. You can also pan to a different part of the image by pressing theCTRLkey and hold theRight Mouse Buttonwhile dragging.
Step 3: Setting the Dimensions of the Output Images
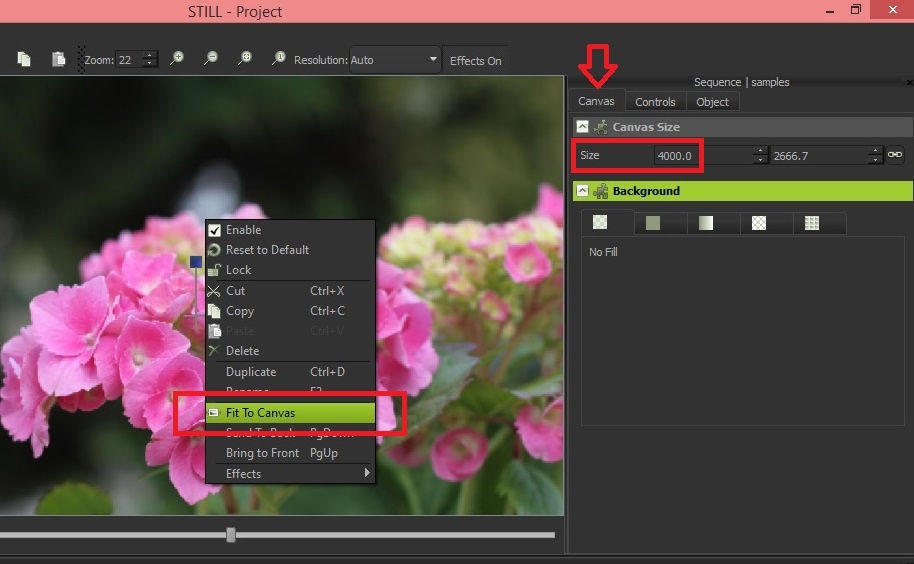
You can resize all the images in a directory by changing the size of the canvas to desired dimensions as explained below.
Select the Canvas tab in the Parameters panel (top right corner)
Edit the size to whatever dimensions, you prefer. The Directory object will immediately adjust itself to the new size of the canvas.
Now, you need to ensure that all the images in your directory cover the entire canvas. This can be done by Right Clicking on the image in the Viewer and then selecting
Fit to Canvas.
Step 4: Editing (Cropping, rotating and panning)
Once you have set the output canvas size, you can perform a number of tweaks to change the appearance of the images. You can control how the images will fill up the canvas, crop them, scale them, rotate them, and much more. There are two approaches you can take to make these changes - automatic or manual.
Use the Resize parameter under Object to select whether you want to make changes in manual mode or the automatic mode.
Method A: Automatic Canvas Filling
Fit: Selecting this option will resize your images to fit both the dimensions of your object, without preserving the aspect ratio.
Stretch: If you select this option, then the image is automatically stretched to fit both the dimensions of your object, while also preserving the aspect ratio.
Fill: This setting performs both resizing and cropping of the images. If you select this, then your images will be automatically scaled and cropped to fill up the object's rectangle. This tool comes very handy for cropping.
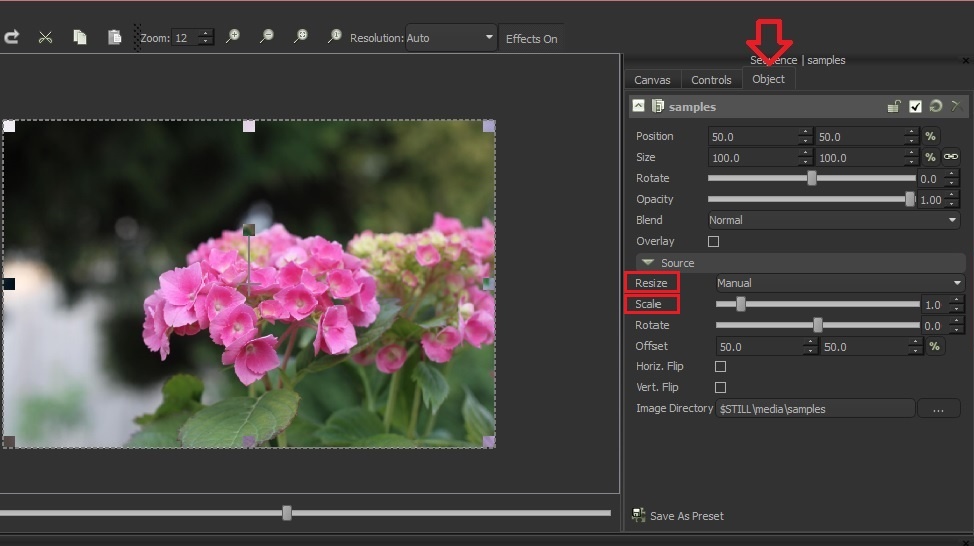
Method B: Manual Canvas Filling
This is as simple as the automatic modes, but with the additional benefit of more custom features. If you are using the manual mode, all you need to do is specify a custom scale using the Scale parameter. You can also manually scale, rotate and pan your image inside the Viewer.
Scaling: This feature can be used to scale your image from 0 to 10 times, in gradations of 0.1. You can use this feature by moving the Scale slider horizontally. Another way of doing this would be to use the
Shiftbutton and the Mouse Wheel inside the Viewer.Rotating: You can use this feature to rotate images around their centers. You can do this by simply moving the Rotate slider horizontally. This can also be done by using
Shift,CTRL, and then the Mouse Wheel inside the Viewer.Panning: The Panning feature allows you to offset the image horizontally and vertically from the center of the object. It is quite simple to perform, and only requires the use of
Shiftand the Mouse button. Press and hold down the Shift button, and use the Left Click of the Mouse to select the image and move it around. You can also do this by editing the Offset values.
Step 5: Exporting the Image Directories
When you're done editing, browse the image directory using the frame slider to check if all the images look good with the scaling and cropping applied and re-adjust if necessary. Now you are ready to export the images.
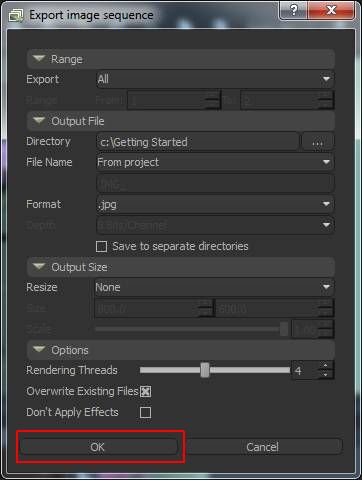
Select
File>Export Image Sequence, or click on theExport Image Sequenceicon. An export dialog box will pop up. Here you can browse to the directory where you want your images to be saved.You have the option to select which of the images in the directory you wish to export - Current, All or a Range. You can also select the format of the output images - JPG, PNG, or others.
You will also find a checkbox in the export dialog box - Save to Separate Directories. By default, this checkbox is unchecked, which means that all the images will be exported to the same output directory. But, if you want to create separate output directories for each respective directory, then check the checkbox.
Click
OK, and wait for the progress bar to complete. Once it is done, you will find all your edited images in their respective output directories.